
In this article we'll take the code from the amazing book Zero to Production in Rust and deploy it to AWS using Flightcontrol. I'll take you along on the steps taken and my experience while following them.
I've been following the book Zero to Production in Rust as a re-introduction to Rust and to understand how important topics, such as application monitoring, work in the language. However rather than deploying to AWS, the book decided to deploy to Digital Ocean, a vendor that doesn't have my preference. This was done because Digital Ocean offers a slightly easier onboarding than AWS. Thankfully Flightcontrol exists to abstract away the complexities of hosting on AWS, so it is just as simple.
We'll be following Flightcontrol's getting started guide and adapting it to our needs. In an outline this boils down to creating a Flightcontrol account, an AWS account, linking the two, attaching GitHub (where we'll host our code), and finally creating a Flightcontrol project that instructs the service on how to orchestrate AWS. For the Rust application I've forked the book's codebase to which any needed changes (such as the flightcontrol.json configuration file and automated docker build using GitHub Workflow) have been added.
Flightcontrol onboarding
Creating an account with Flightcontrol couldn't be easier. Simply enter a username and password and we're off to the races. Their individual plan is free to use, and they don't even ask for any credit card information.
After sign-up you're offered to connect their GitHub application. The application asks for the following permissions:
- Read access to administration and metadata
- Read and write access to checks, code, commit statuses, deployments, issues, pull requests, and repository hooks
This may seem relatively broad but isn't out of the ordinary for the tasks that Flightcontrol will need to perform for us and it's similar to permissions requested by PaaS providers.
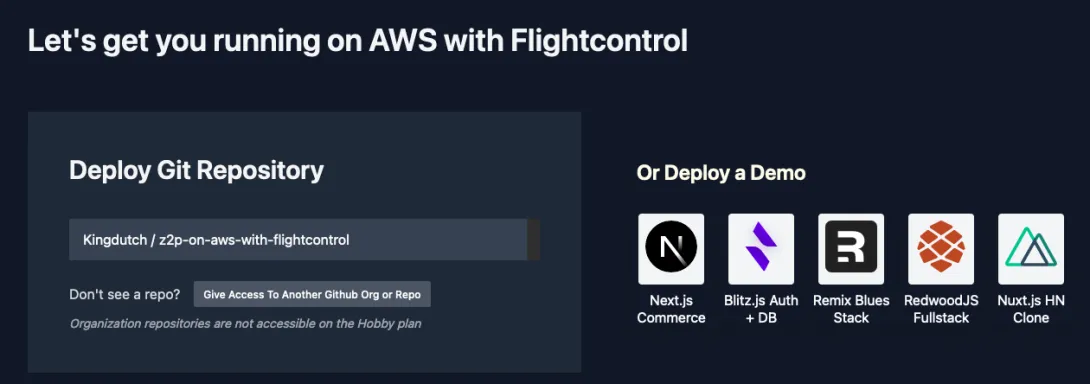
Once the GitHub application is installed we can select our repository in Flightcontrol and we're on to configuring our deployment.
Configuring Flightcontrol
I'm a big fan of infrastructure as code since it allows easily rolling back to earlier builds and provides a clear history of when your infrastructure changed. It also means there's no need to click through a UI after you've made your code changes, you can simply include the required infrastructure in your PR.
Flightcontrol offers you the option of configuring it by adding a flightcontrol.json to your repository or by using the GUI on their website. Unfortunately using the GUI will not automatically generate and commit a flightcontrol.json for you, so from what I understand at this point it's an either-or choice at the moment.
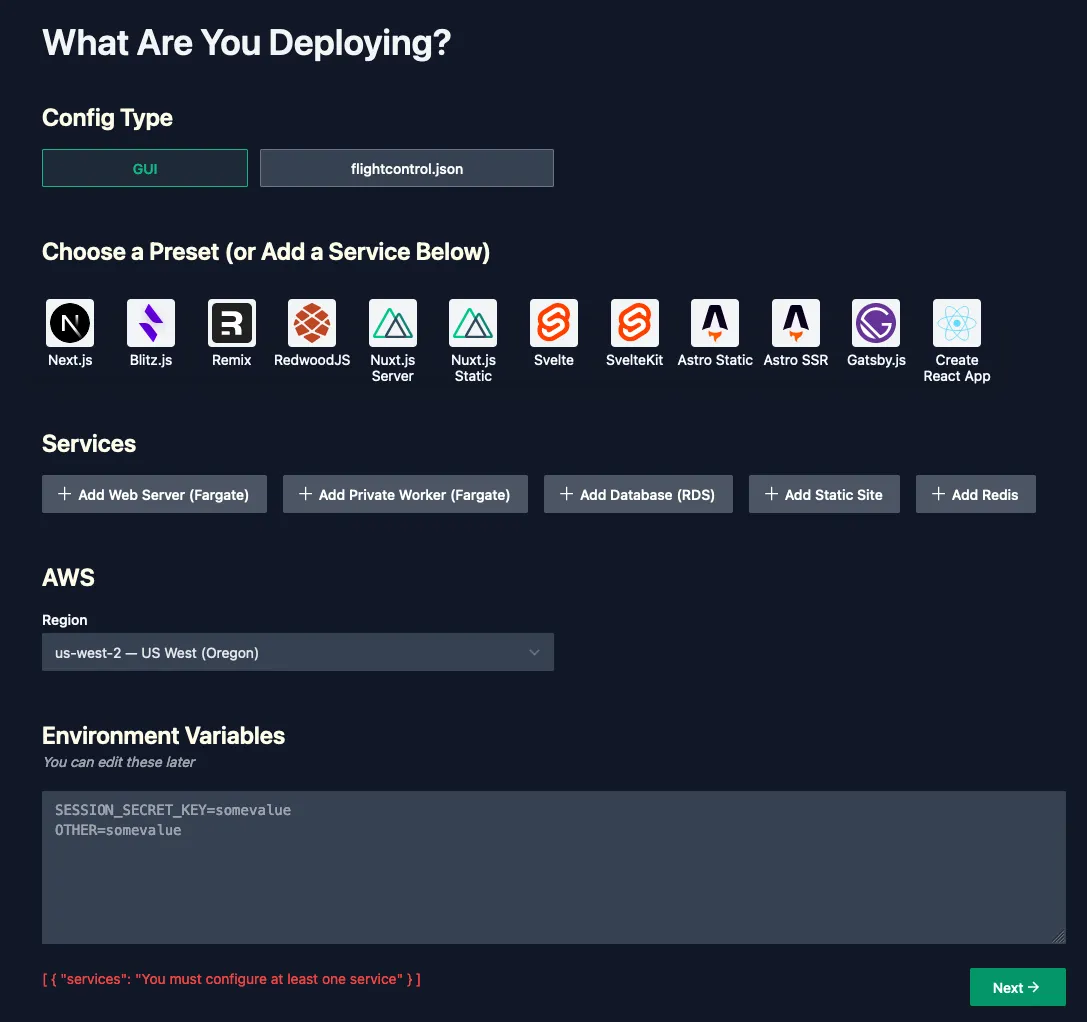
To get started quickly we'll stick to the GUI for now though. In the onboarding flow we're greeted by a nice configuration screen that allows us to configure exactly what we need. We can choose from templates (targetted at the JavaScript/TypeScript community at the moment) or we can configure the services we need from AWS ourselves. Since we're not deploying any of the presets we'll add services ourselves.
Our application
The application that's built in Zero to Production in Rust is a custom mailing list application that requires a few services. There is a single application included in the Rust code with a few threads. The application is a webserver that spawns threads to handle different requests and a worker to deliver the emails, this all runs in one container. Additionally it requires a PostgresQL database to store user data and mailing lists. Finally it uses a Redis store to manage user sessions for the admin interface.
There is no docker preset listed on the GUI but there is a Docker example in the documentation. From looking at the example we can see that the service type used for the custom dockerfile is "fargate" so we'll start by adding a Fargate web server service.
There's two things we need to change from the default Web Server configuration. we fill in the name field with "Webserver" and we change the Health Check Path to /health_check which is a dedicated route in our application. We can leave the rest as is: the Dockerfile is in the root of our repository and we also want that root to be the working directory for docker.
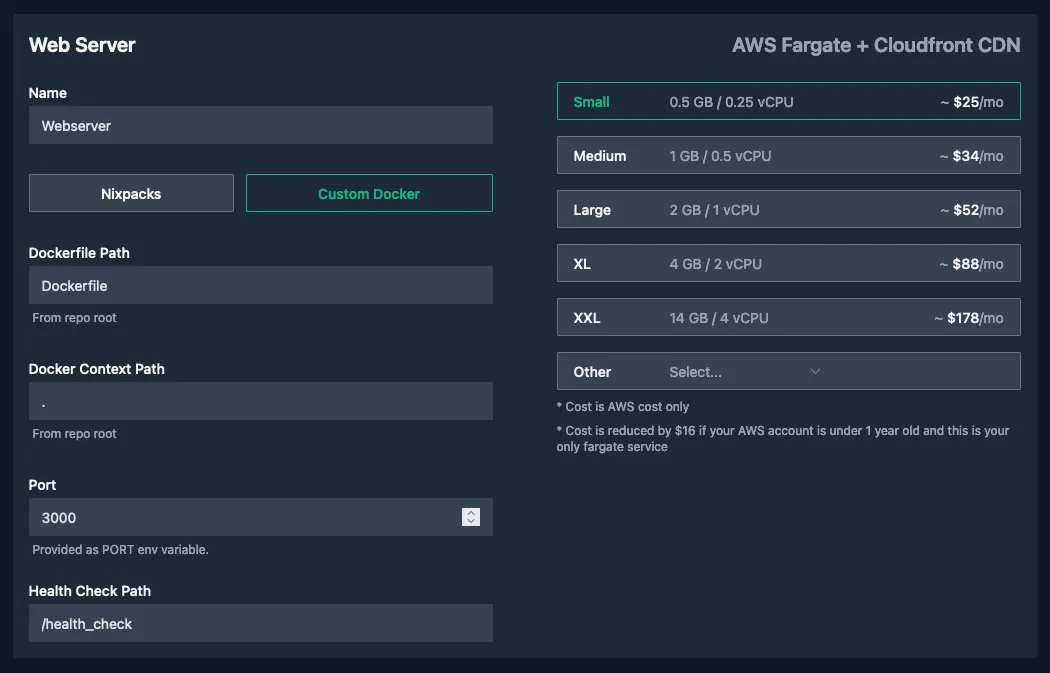
We make a note that the port is provided through the PORT variable which will require a slight tweak to our application, which expects it in APP_APPLICATION__PORT. We could also change our hardcoded configuration from 8000 to 3000 but that may trip up developers we're collaborating with (or ourself in the future). It would've been great if we could configure the environment variable for the port in Flightcontrol so we didn't need to change our application (changing the application behaviour is not always possible).
The Postgres database
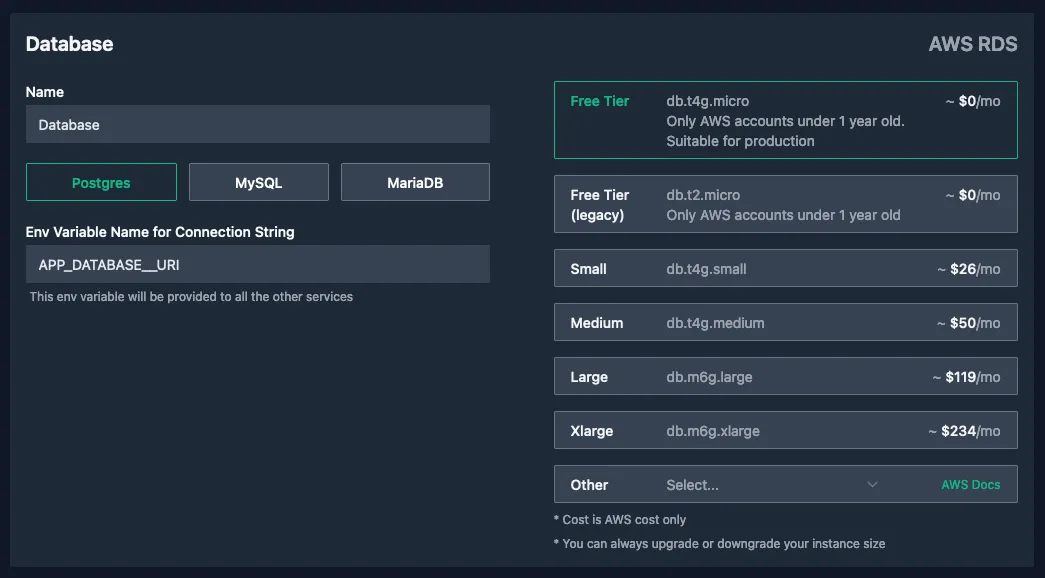
Next we add the database. We click the "Add Database (RDS)" button, leave the name at the default "Database" and leave the type at the default "Postgres".
We do change the variable name to APP_DATABASE__URI and we make another note that we'll need to make some tweaks to our application: the book version of our application expects the elements of the URI (e.g. username, password, host) as separate elements and does not accept this as a single string.
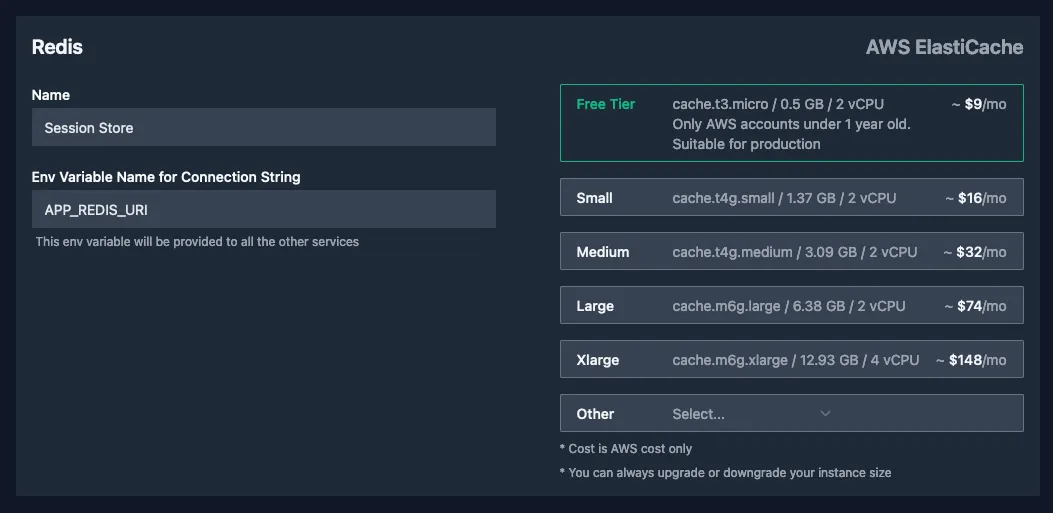
Our Redis session store
Finally we add our redis service by clicking "Add Redis". We name our redis service "Session Store" since that's what we'll use it for. Luckily our configuration is already capable of receiving the redis configuration as a single string so we change the "Env Variable Name for Connection String" for our Redis service to APP_REDIS_URI.
AWS Region and Environment Variables
For the region you can choose whatever works for you. I've chosen eu-central-1 -- EU (Frankfurt) since it's close to where I live and it means the data of my test app will be stored in Europe.
The environment variables we'll leave empty.

All that's left for us to do is hit "Next"!
Connecting AWS
We'll now need to connect our Flightcontrol account to our AWS account. If you haven't created an AWS account already you'll find a "Create New AWS Account" button on this page.
If you have an account then authorization is only a few clicks. Click the large "Open Authorization Page in AWS" button, check the box that says "I acknowledge that AWS CloudFormation might create IAM resources with custom names.", and finally click "Create stack".
You'll now see that you have created your AWS CloudFormation Stack, which will contain all the resources for our application. In the Events tab that's open by default we can see Flightcontrol hard at work for us.
The Flightcontrol connection page is still open in the background. If we switch to it we'll see "Waiting for the stack to be created" before it automatically switches to the next screen. While Flightcontrol is deploying your app they want a few more details: Your name, how to address you and how you heard about Flightcontrol.
The Dashboard
With this final onboarding step complete we can now see that our app is being deployed by Flightcontrol. This is a good moment to grab a coffee or tea while Flightcontrol works its magic.
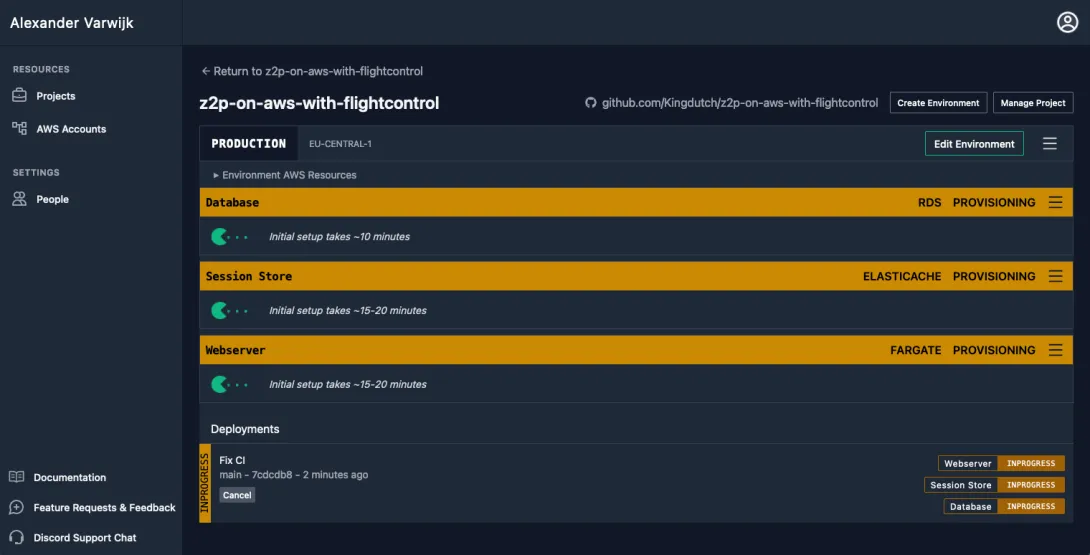
After a small wait for the initial set-up we can see that we now have a database and a session store. Unfortunately our application failed to build.

This is not unexpected because we have not yet fixed the configuration compatibility issues in our application. Clicking on "Runtime logs" brings us to AWS cloudwatch and allows us to see one of the expected errors:
thread 'main' panicked at 'Failed to read configuration.: missing field `base_url`', src/main.rs:13:45This shows us that we don't just need to solve our database URI and application port, but also need to ensure we provide a base_url on which our application can be reached. The base URL is used to create the right links when sending newsletters or rendering pages. Flightcontrol provides our web connected containers with the useful FC_URL variable which we'll have to map into our configuration, we'll fix this with our two other environment variable changes.
Making our Rust application Flightcontrol compatible
So far we've made note of three changes we need to make which both relate to how our application takes in information from its environment about what our infrastructure looks like. The changes described below can also be viewed on GitHub.
Changing our database configuration
In the version of the Zero to Production book we receive our database connection details as separate parameters: host, port, username, password, database_name and require_ssl are all their own environment variables. However, when using Flightcontrol we only have a single database URI available that contains all this information.
Luckily sqlx' PgConnectionOptions contains a from_string method which is all we need in production. To make sure we can still create separate databases for each test we do need to provide the option to set the database name if it's not included in the URI.
We remove the database configuration from our configuration/base.yaml file and move our development configuration to configuration/local.yaml:
database:
  uri: postgresql://postgres:password@127.0.0.1:5432
  database_name: "newsletter"
Our DatabaseSettings configuration struct is updated accordingly:
#[derive(serde::Deserialize, Clone)]
pub struct DatabaseSettings {
    pub uri: Secret<String>,
    pub database_name: Option<String>,
}
And finally we adjust our with_db and without_db methods to handle the new situation.
impl DatabaseSettings {
  pub fn without_db(&self) -> PgConnectOptions {
    let options = PgConnectOptions::from_str(self.uri.expose_secret()).expect("Could not parse database URI");
    if options.get_database().is_some() {
      panic!("A database was provided in the URI but this should not happen in this environment, move the name to the database_name field instead.");
    }
    options
  }

  pub fn with_db(&self) -> PgConnectOptions {
    let mut options = PgConnectOptions::from_str(self.uri.expose_secret()).expect("Could not parse database URI");
    if options.get_database().is_none() {
      if let Some(database_name) = &self.database_name {
        options = options.database(&database_name)
      }
      else {
        panic!("No database was specified in the URI and none was specified in the database_name setting either.");
	  }
    }
    options.log_statements(tracing::log::LevelFilter::Trace);
    options
  }
}
We fail the without_db method when a database is provided since sqlx does not provide us with a method to clear the database in the options struct. It also doesn't yet have a way to get individual properties to create a new options struct without database. However, passing the options struct with a database from without_db could break our tests in some hard to debug cases so it's better to just abort with a helpful error message. We don't expect to call without_db in production where we'd be unable to remove the database name from the URI.
The with_db method is updated to use the URI as-is, but in case the URI does not have a database specified (such as in local development) we require one to be passed in through our database_name configuration. This also allows our test code to use a random empty database for each test.
Using PORT to determine our webserver port
As mentioned earlier, Flightcontrol does not yet allow us to change the name of the environment variable that tells our application on which port HTTP requests are forwarded to our application. This means we'll have to adjust our configuration logic to use the PORT environment variable directly.
The config crate does provide a method to set aliases through the Serde alias directive, but this only works on the level of a specific field. It does not work for nested fields. To work around this we'll change our config builder and listen to the PORT environment variable directly, setting it as an override on our application.port configuration.
let mut config_builder = config::Config::builder()
        .add_source(config::File::from(
            configuration_directory.join("base.yaml"),
        ))
        .add_source(config::File::from(
            configuration_directory.join(&environment_filename),
        ))
        // Add in settings from environment variables (with a prefix of APP and '__' as separator)
        // E.g. `APP_APPLICATION__PORT=5001 would set `Settings.application.port`
        .add_source(
            config::Environment::with_prefix("APP")
                .prefix_separator("_")
                .separator("__"),
        );

    // Allow PORT to override APPLICATION_PORT
    if let Ok(port) = std::env::var("PORT") {
        config_builder = config_builder.set_override("application.port", port).expect("Could not set port from PORT env variable");
    }

    let settings = config_builder.build()?;
Rather than building the config directly, we store our builder in a mutable variable. If the PORT environment variable is set then we add an override to our builder and then finally we build our configuration. This ensures our application properly responds to changes in configuration in our Flightcontrol dashboard.
Using FC_URL to set our application base_url
We repeat the trick we used for our PORT variable and also add an override to our config builder before we build our config.
// Allow FC_URL to override APPLICATION__BASE_URL
if let Ok(base_url) = std::env::var("FC_URL") {
  config_builder = config_builder.set_override("application.base_url", base_url).expect("Could not set base_url from FC_URL env variable");
}
Launching our application
With the above changes your application should successfully deploy. If you've come all this way, congratulations! In your dashboard you should see the cloudfront URL that allows you to visit your deployed application.
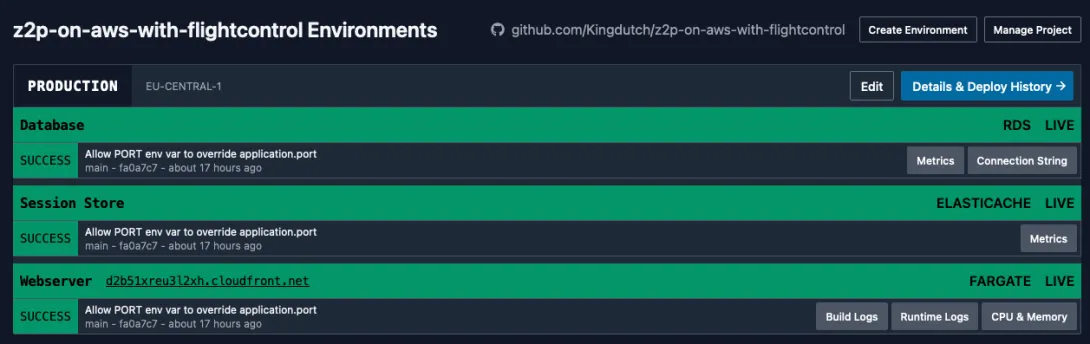
Migrate the database
On your Flightcontrol dashboard for your database you will see a button named "Connection String". This will bring you to your AWS Parameter Store and allow you to reveal the connection string that is also provided to your main application container ("Webserver").
From your local development environment make sure you have checked out to the same version of the code deployed to AWS and run DATABASE_URL=<url> sqlx migrate run replacing <url> with the connection string you found in your Parameter Store.
This will create all the database tables and seed the admin user. You're now ready to login by visiting the cloudfront URL and navigating to the /login page.
Pitfalls and next steps
If you've followed along above then you have a working application. However you may have some questions as to next steps or run into an issue.
Preview environments
One of the best features of services like Vercel or Platform.sh are their ability to connect to your repository and automatically build environments for every PR so that they can be used for QA. Flightcontrol supports this too, but unfortunately they do not yet support Redis containers in preview environments so we couldn't set it up for the Zero to Production app. It's on their roadmap.
Docker pull limit
If you follow along with this article and you notice that a deployment fails due to a docker limit then you'll need to add the DOCKER_USERNAME and DOCKER_PASSWORD environment variables using your Docker Hub account as per the Flightcontrol documentation.
Flightcontrol uses AWS CodeBuild to build the Dockerfile included in our repository. Any images your Dockerfile may need are pulled from Docker Hub. By default this happens with unauthenticated requests. Docker Hub has very strict rate limits for unauthenticated requests that you'll run into quite quickly. By providing the DOCKER_USERNAME and DOCKER_PASSWORD environment variables, Flightcontrol can authenticate on your behalf and bypass the rate limit.
Automating the sqlx migration
I've not yet found a way to automatically migrate the database of our application. For the JavaScript templates that Flightcontrol supports this is probably relatively simple (though I haven't tried it out). However, to keep our container small we don't include our migration SQL and there's no hook that Flightcontrol provides to run this directly from a clone of our database. Hopefully that's something they'll solve in the future.
Change your app secret and admin password
With the way we've now deployed the application we're using the default application.hmac_secret from configuration/base.yaml. This is good to test that everything works because it's the secret used for the password in our migration. However, you'll want to use the Flightcontrol environment variables to set APP_APPLICATION__HMAC_SECRET to set a different secret and change the password for your admin account.
It would be great if Flightcontrol provided an FC_PROJECT_ENTROPY for, similar to what Platform.sh does. It's defined as "A random, 56-character value created at project creation and then stable throughout the project's life. Can be used for Drupal hash salts, Symfony secrets, and other similar values". Then that value could be used rather than having to provide one through the GUI yourself.
Conclusion
Getting started with Flightcontrol was easy thanks to their onboarding wizard. In a relatively short time all the infrastructure I needed (our application container accepting web requests, a Postgres database and Redis) was up and running.
The hardest part was figuring out how to change the configuration set-up to accept the Postgres URI in combination with the need for our testing set-up to control the database, this could be made simpler by Flightcontrol by providing the individual parts as mappable variables or by the sqlx library by letting individual connection options be read.
The Flightcontrol team was very responsive in their discord whenever I had a question while getting everything figured out. It's very exciting to see a company offer the convenience of a PaaS provider like Platform.sh with the benefits of hosting on AWS that allows it to be cheaper and allows me to bring my own docker images.
The roadmap shows that the Flightcontrol team is on the right track to build an amazing tool for developers in any language and I'm very excited to see what they ship next.
Updated on 2023-01-22 to clarify the need for Docker Hub credentials and the cause of hitting a rate limit.
